 MEMBERSHIP LOGIN
 JOIN PRI
PRI Education: Proper Steering Setup for Race Weekend
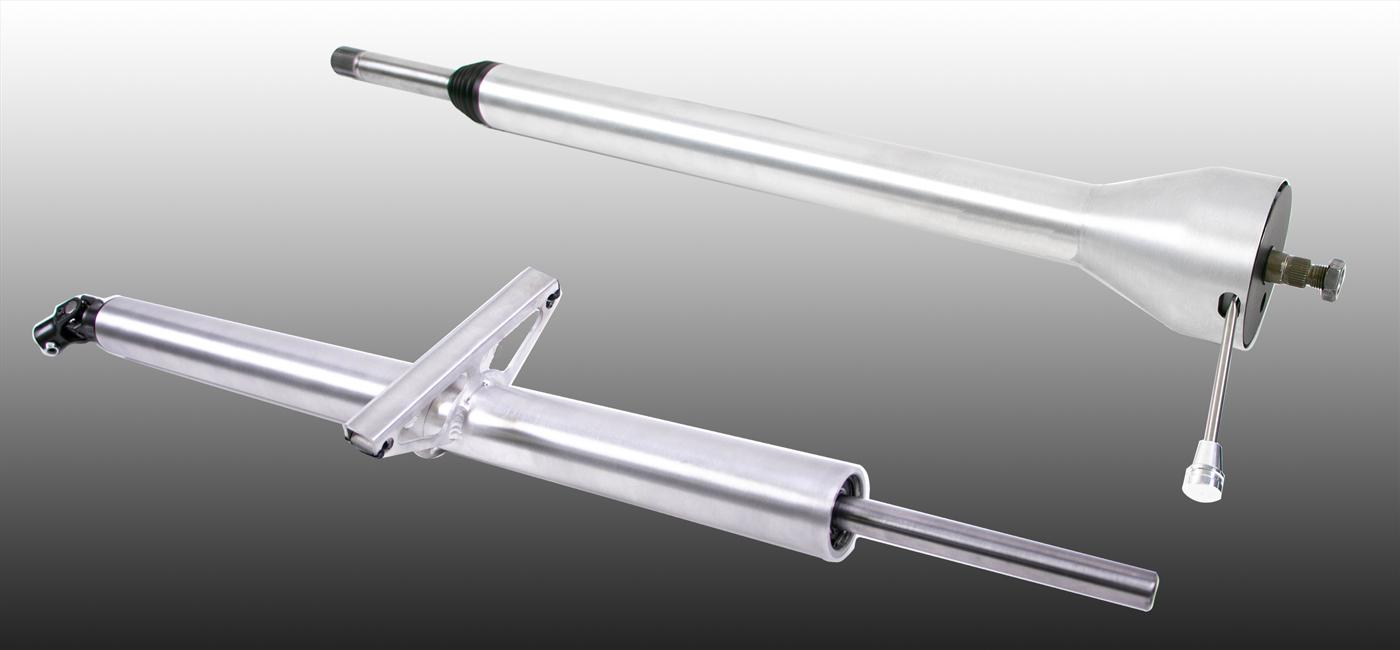
Steering columns are available either in a fixed shaft length, above, or extra shaft length, below, which allows the driver to trim the shaft to the proper length after determining the most comfortable position for driving the race car. Photos courtesy of IDIDIT and Stephanie Davies Bardekoff.
Ensure driver comfort and safety with these tips on how to properly install a steering column.
When situating a steering column in a race car, driver comfort is of the utmost importance, as the driver must feel comfortable in their seat to drive effectively and safely. Correct measurements are the most important factors in a steering column installation to ensure the highest level of comfort, and below we will go through the measuring process to properly mount the steering column.
Preparation
When preparing to measure the steering column setup, be sure to use the driver’s seat that will be installed in the car. The seat needs to be in place to determine steering wheel, shifter, and pedal position, as these all relate to each other and impact the driver’s comfort. It is also important to have the steering wheel and adapter or quick-release steering hub that will be used on the column.
Centering and Adjusting
Once the seat is in place and the location of the engine, cylinder head, headers, and transmission are determined, make sure the steering wheel is centered to the seat. Installing the column offset or at an angle will make it feel awkward and uncomfortable. With the column centered, adjust the seat forward or back for optimal pedal and shifter position. Then, adjust the column (with an adapter or quick-release steering hub) and steering wheel so that the driver’s arms are in a relaxed, comfortable position. Some columns are made in a set length, while others offer extra shaft length so the driver can trim it to the proper length after determining the correct position. For these kinds of columns, it’s at this point where the shaft is trimmed to the desired length and the adapter or quick-release steering hub is welded in place.

Once all the positions are determined, next is the installation of the column drop/mounts. A retrofit column made specifically for a car’s year, make, and model should bolt right into place. With a universal-fit column, however, place the drop/mount onto the column and adjust the drop/mount’s position to the factory mount location. The drop/mounts should fit snugly to the underside of the dash with no wobbling or vibration. The lower mounts should be stable and able to fit the angle of the firewall where the column will pass through. If the car has a floor-mounted brake or clutch, make sure there is enough clearance for the column. Once the firewall mount is in place and secured, it’s vital to make sure that this mount is sealed tightly to prevent exhaust fumes, heat, dirt, and water from entering the interior.
Measuring to Find the Right Length
For those who do not have the steering wheel and adapter or quick-release steering hub but are trying to measure to find the right column length, the steering column and wheel assembly can be simulated with an aluminum pie tin or large paper plate and a three-foot wooden dowel. Add between 1 1/2 and 3 inches beyond the firewall/floor if using a steering box. If using a rack, the column can go as far as 5 inches into the engine compartment. Watch for clearance. First, tack the tin or plate to the dowel (steering wheel to column), then position the driver comfortably in the seat while holding the dowel system in place. Have someone measure and mark the essential dimensions: overall length and the distance between the center of the column and the bottom of the dash. Do not forget to mark the point where the column will pass into the engine compartment and the centerline of the driver’s body and seat, as they are also important measurements. When using this method, remember that the wheel and adapter or quick-release steering hub will add length to the column. Most aftermarket steering wheels will add 3–6 inches from the gripping surface of the wheel to the adapter, and most aftermarket adapters or quick-release steering hubs will add another 2–5 inches from the steering wheel to the top of the outer housing of the steering column. Make sure to allow for these additions and mark the dowel accordingly.
For safety consideration, utilize a collapsible steering column and/or shafting. But, in short, there is no right or wrong setup for a steering column assembly as long as it is installed safely and securely, and the driver is in the most comfortable position possible. After all, a happy and relaxed driver is most likely to make it to the podium!
Kelly Tuttle is the Marketing Manager for IDIDIT, LLC in Tecumseh, Michigan, where she oversees all aspects of the company’s marketing efforts. She’s been involved with marketing in the automotive industry for the past six years, but has had a passion for all things motorsports—especially those that involve speed on both two and four wheels—since she was a young girl.